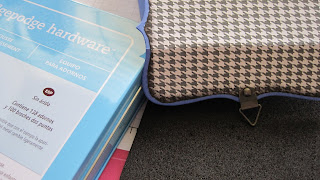
The original post for this little gift purse was a little confusing to me when I needed to make another one and had to read my own instructions. I took some photos and made changes to the instructions and hope it will be easier to follow. =/
Here's how to make one:
8-1/2" x 11" (2) one for the Bigz Top Note Die
6" x 4-1/2" DSP
Brads (3)
Hodgepodge Hardware Knocker w/ Brad
Rhinestone Brad
Jumbo Eyelets
Cropodile
Top Note Die Cut
Big Shot
Sticky Strip
SNAIL
Paper Piercer
16" Ribbon
Circle Punches
 Take an 8-1/2 x 11 piece of card stock and cut off a 3" X 11" strip and score 1/4" along the 11" sides. Score at 3-1/4 " from each end and snip where the corners will meet.
 Taper the edges from 1/4" at the bottom to about 3/8" at the top so the top of the purse with the flap will be a little thinner than the bottom.


Attach a jumbo eyelet on either side to make the handle.


Trim the 'stitched' part off the hounds tooth or piece that will lie on top of the solid Top Note die cut.


Sponge the hounds tooth piece edges with Basic Black ink and the base color should be sponged with it's color (Ballet Blue on Ballet Blue) then adhere together.

 Score the die cut at about 1/2" and 2-1/4" then attach the 1/2" part to the back of the purse with 3 brads.
 Use a piece from the Hodgepodge hardware for the flap closure hook and a brad for the front of the purse closure post.
Be sure to cover the brads on the inside of the purse with a narrow strip of card stock and circle punched card stock to cover the one in the front and the one behind the flap!


 Decorate and fill with a gift or chocolate would be nice, too.
Feel free to make one and send it full of yummy chocolate to ME! I love surprises.


This is such a fun tutorial! Thank you so much!! :)
ReplyDelete